Signals Lights For Harley Davidsons: A Comprehensive Guide

Signals Lights for Harley Davidsons: A Comprehensive Guide
Harley Davidson motorcycles are renowned for their iconic style and powerful performance. However, ensuring that your Harley is both visible and safe on the road requires proper functioning signal lights. This comprehensive guide will delve into the various types of signal lights available for Harley Davidsons, their installation, troubleshooting, and maintenance tips.
Types of Signal Lights for Harley Davidsons
Harley Davidson offers a wide range of signal lights to suit different models and preferences. The most common types include:
-
OEM Signal Lights: These are the original equipment manufacturer (OEM) signal lights that come standard on Harley Davidson motorcycles. They are designed to meet specific safety and performance standards and provide a seamless integration with the bike’s electrical system.
-
Aftermarket Signal Lights: Aftermarket signal lights offer a wider variety of styles, colors, and features than OEM lights. They can be customized to enhance the aesthetics of your Harley and provide additional functionality, such as sequential turn signals or integrated running lights.
-
LED Signal Lights: LED (light-emitting diode) signal lights are becoming increasingly popular due to their energy efficiency, long lifespan, and brighter illumination. They consume less power than traditional incandescent bulbs and provide a more noticeable signal to other drivers.
-
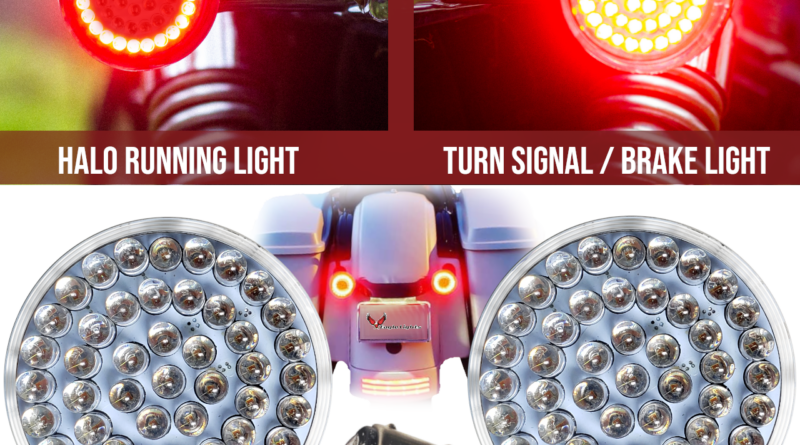
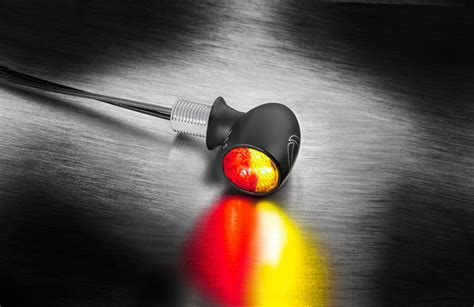
Halo Signal Lights: Halo signal lights feature a ring of LEDs around the perimeter of the lens. This creates a distinctive and eye-catching effect, making your Harley more visible in low-light conditions.
Installation of Signal Lights
Installing signal lights on a Harley Davidson requires some basic electrical knowledge and tools. Here are the general steps involved:
-
Disconnect the Battery: Always disconnect the battery before working on any electrical components to prevent short circuits.
-
Remove the Old Signal Lights: Locate the existing signal lights and carefully remove them by unscrewing the mounting bolts or disconnecting the electrical connectors.
-
Mount the New Signal Lights: Position the new signal lights in place and secure them using the provided mounting hardware. Ensure that the lights are properly aligned and facing the correct direction.
-
Connect the Electrical Wires: Connect the electrical wires from the new signal lights to the corresponding wires on the motorcycle’s wiring harness. Use crimp connectors or solder and heat shrink tubing to ensure a secure and weatherproof connection.
-
Test the Signal Lights: Reconnect the battery and test the operation of the signal lights. Make sure that all lights are functioning properly and are visible from all angles.
Troubleshooting Signal Light Issues
If you encounter any issues with your Harley Davidson’s signal lights, here are some common troubleshooting tips:
-
Check the Bulbs: Inspect the signal light bulbs for any signs of damage or burnout. Replace any faulty bulbs with new ones of the correct wattage and type.
-
Inspect the Wiring: Examine the electrical wires for any breaks, loose connections, or corrosion. Repair or replace any damaged wires as necessary.
-
Check the Flasher Relay: The flasher relay is responsible for controlling the blinking rate of the signal lights. If the signal lights are not blinking or are blinking too fast or too slow, the flasher relay may need to be replaced.
-
Test the Switch: Ensure that the signal light switch is functioning properly. Clean any contacts or replace the switch if necessary.
Maintenance Tips for Signal Lights
To keep your Harley Davidson’s signal lights in optimal condition, follow these maintenance tips:
-
Regular Cleaning: Regularly clean the signal light lenses and reflectors to remove dirt and debris that can obstruct visibility.
-
Bulb Replacement: Replace signal light bulbs as soon as they burn out to ensure proper illumination.
-
Wiring Inspection: Periodically inspect the electrical wiring for any signs of damage or corrosion. Repair or replace any faulty wires to prevent electrical issues.
-
Lubrication: Apply a small amount of dielectric grease to the electrical connectors to prevent corrosion and ensure a secure connection.
Conclusion
Signal lights are an essential safety feature on any motorcycle, including Harley Davidsons. By understanding the different types of signal lights available, following proper installation procedures, troubleshooting common issues, and adhering to maintenance tips, you can ensure that your Harley is both visible and safe on the road. Remember to always consult your Harley Davidson owner’s manual or seek professional assistance if you encounter any difficulties or have any questions.
5 Best Signal Lights for Harley Davidsons
Signal lights are an essential safety feature for any motorcycle, and Harley Davidsons are no exception. Not only do they help other drivers see you, but they also make it easier for you to be seen in low-light conditions.
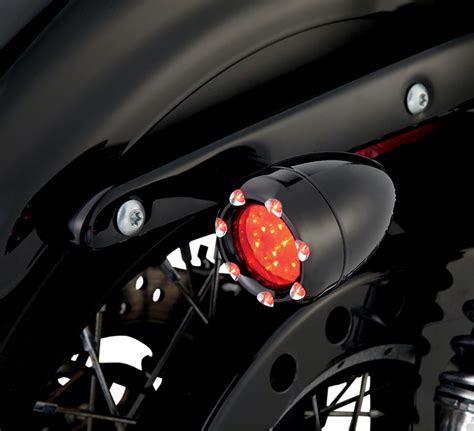
If you’re looking for a new set of signal lights for your Harley, there are a few things you’ll want to keep in mind. First, you’ll need to decide what style of lights you want. There are two main types of signal lights: bullet-style and flush-mount. Bullet-style lights are the more traditional option, and they’re typically mounted on the handlebars or fairing. Flush-mount lights are more modern, and they’re mounted directly to the body of the motorcycle.
Once you’ve decided on a style, you’ll need to choose a color. Signal lights come in a variety of colors, so you can choose the ones that best match your motorcycle.
Finally, you’ll need to decide on a price range. Signal lights can range in price from $20 to $200, so it’s important to set a budget before you start shopping.
1. Kuryakyn Hypercharger Pro LED Signal Lights
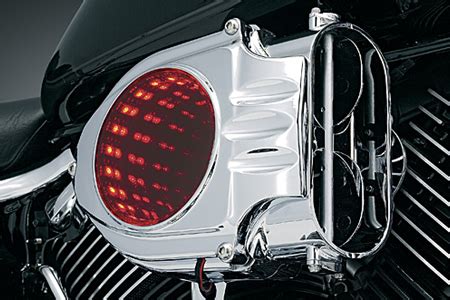
The Kuryakyn Hypercharger Pro LED Signal Lights are a great option for riders who want a bright, stylish set of signal lights. These lights feature a unique hypercharger design that helps to project light further, and they’re also DOT-approved for street use.
2. Custom Dynamics Bullet Style LED Signal Lights
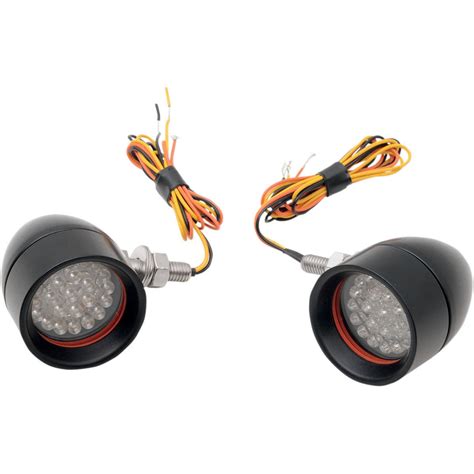
The Custom Dynamics Bullet Style LED Signal Lights are a classic option for riders who want a traditional look. These lights feature a bullet-style design, and they’re available in a variety of colors to match your motorcycle.
3. Arlen Ness Flush Mount LED Signal Lights
The Arlen Ness Flush Mount LED Signal Lights are a great option for riders who want a modern look. These lights feature a flush-mount design, and they’re available in a variety of colors to match your motorcycle.
4. Kellermann Atto DF LED Signal Lights
The Kellermann Atto DF LED Signal Lights are a great option for riders who want a bright, compact set of signal lights. These lights feature a unique design that helps to project light further, and they’re also DOT-approved for street use.
5. J&M Corporation LED Signal Lights
The J&M Corporation LED Signal Lights are a great option for riders who want a bright, affordable set of signal lights. These lights feature a traditional bullet-style design, and they’re available in a variety of colors to match your motorcycle.